
In this section
Build the table of contents and chapters
Build the table of contents that becomes the ePUB navigation, and set chapter breaks so each chapter becomes its own HTML file in the ePUB.
An ePUB has two kinds of structure that a print PDF doesn't: a navigation document (the NAV file, and the NCX file for older reading systems) that readers use to jump around the title, and a split into separate HTML files, one per chapter. In PDFxt you build the first in the Table of Contents panel and the second in the Chapters panel.
Build the table of contents
The table of contents you build here becomes the ePUB's NAV and NCX. Open the Table of Contents panel, the second tab in the left sidebar.
- If the PDF has an embedded outline (bookmarks), the panel shows it, with a note explaining your two options. Click Process as TOC to use the outline as the table of contents.
- If the PDF has no usable outline, build the table of contents from the contents pages instead. Go to the first contents page of the title. When the page has TOC entry (TOCI) zones, an Import TOC from p. button appears at the top of the panel.
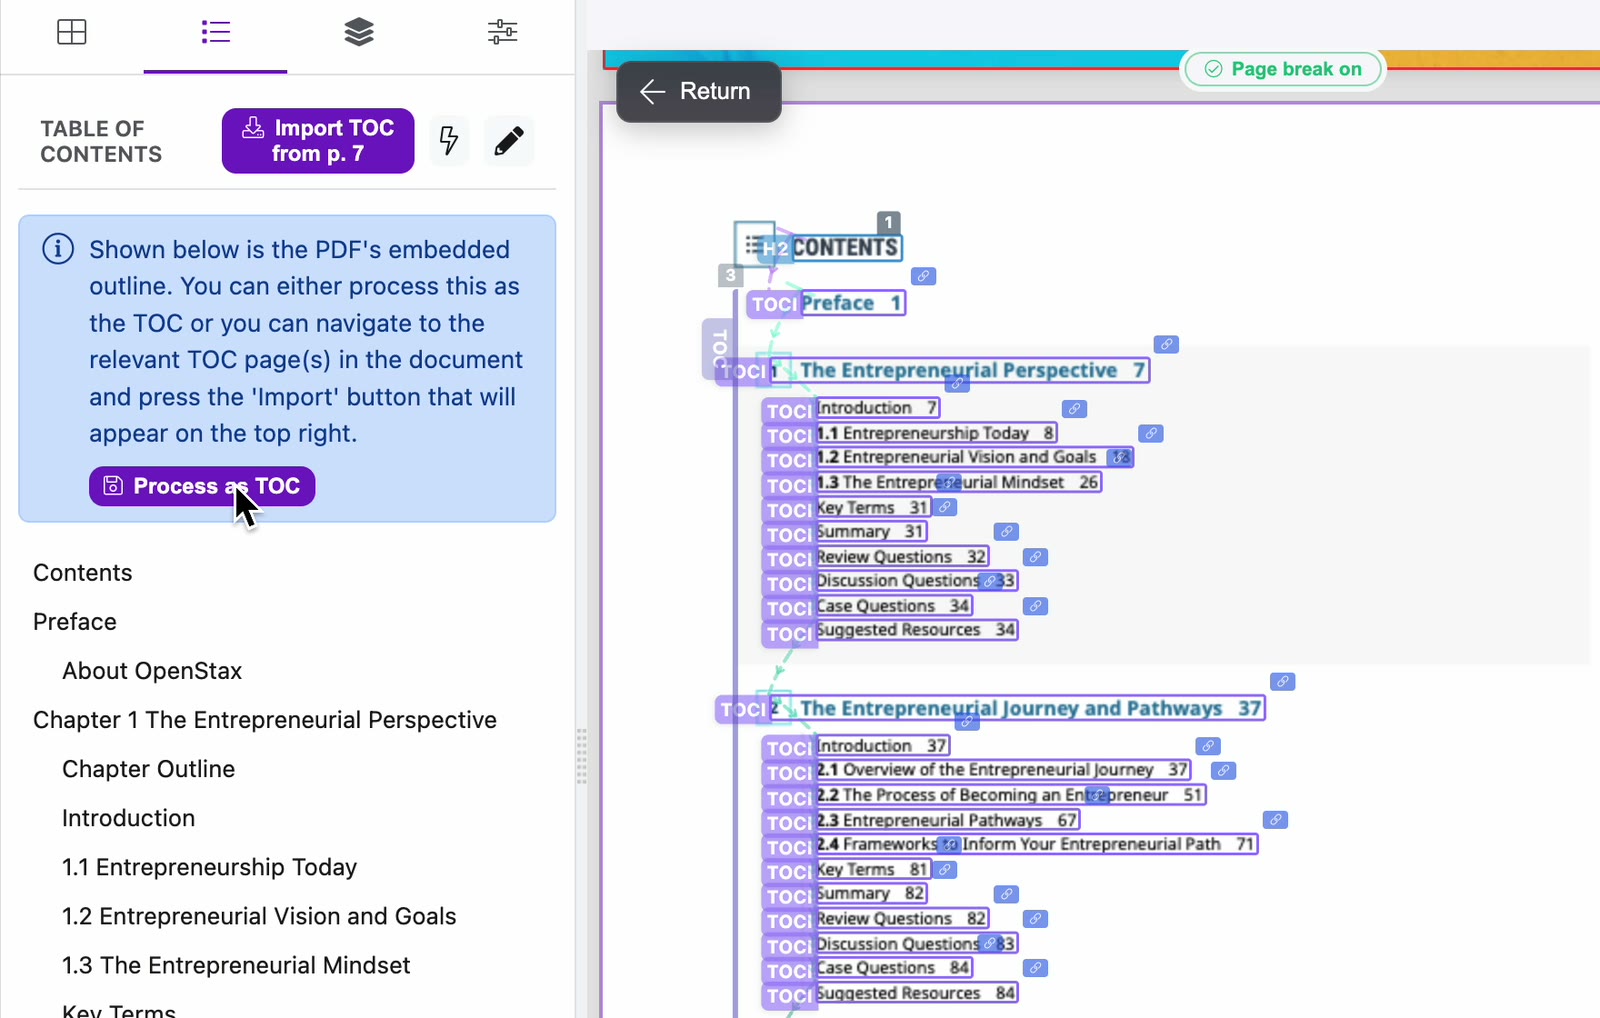
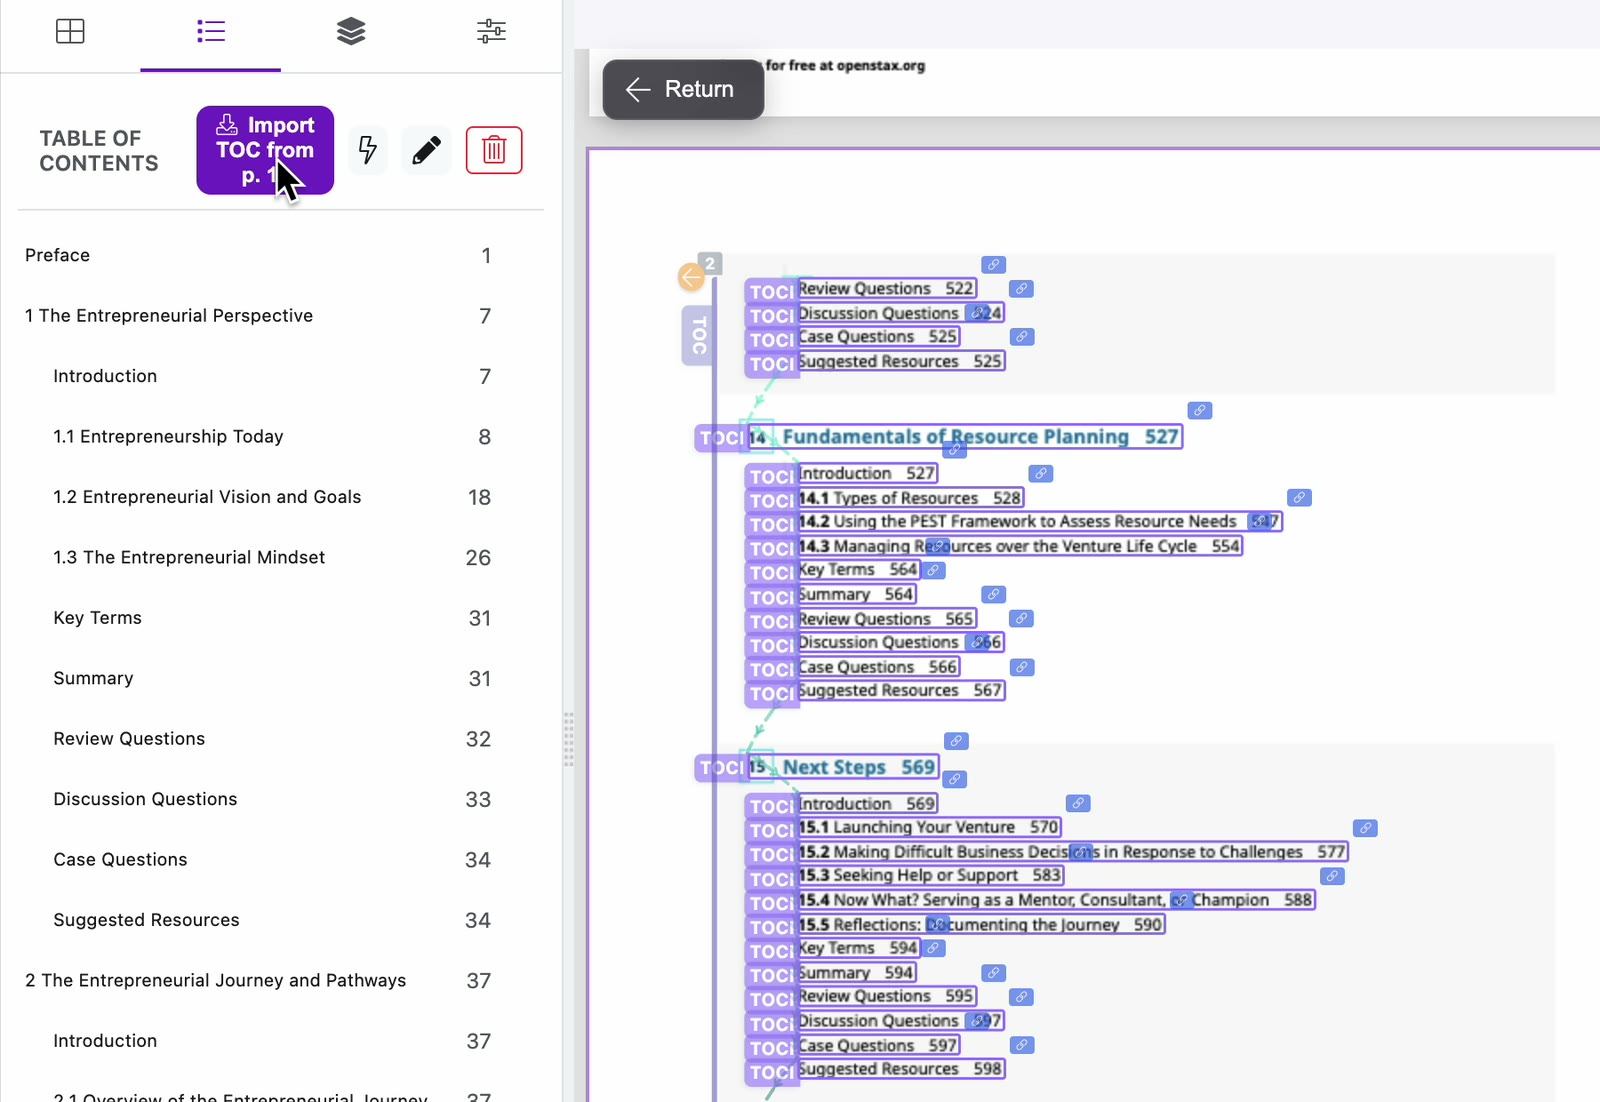
- Click Import TOC from p. to add that page's entries to the list, each with its page number. PDFxt confirms how many entries it imported.
- Go to the next contents page and click the button again. Repeat until you've imported every contents page.
Add missing entries with Batch Edit TOC
The printed contents often leave out front matter such as the cover or the copyright page. Add these entries yourself so readers can reach them from the ePUB navigation.
- In the Table of Contents panel, click the pencil (Batch Edit TOC).
- The dialog lists every entry on its own line as
Title, Destination Page. Indent a line with two spaces to nest it under the line above. - Type the missing entries where they belong. For example, add
Cover, 1andCopyright, 4at the top of the list.
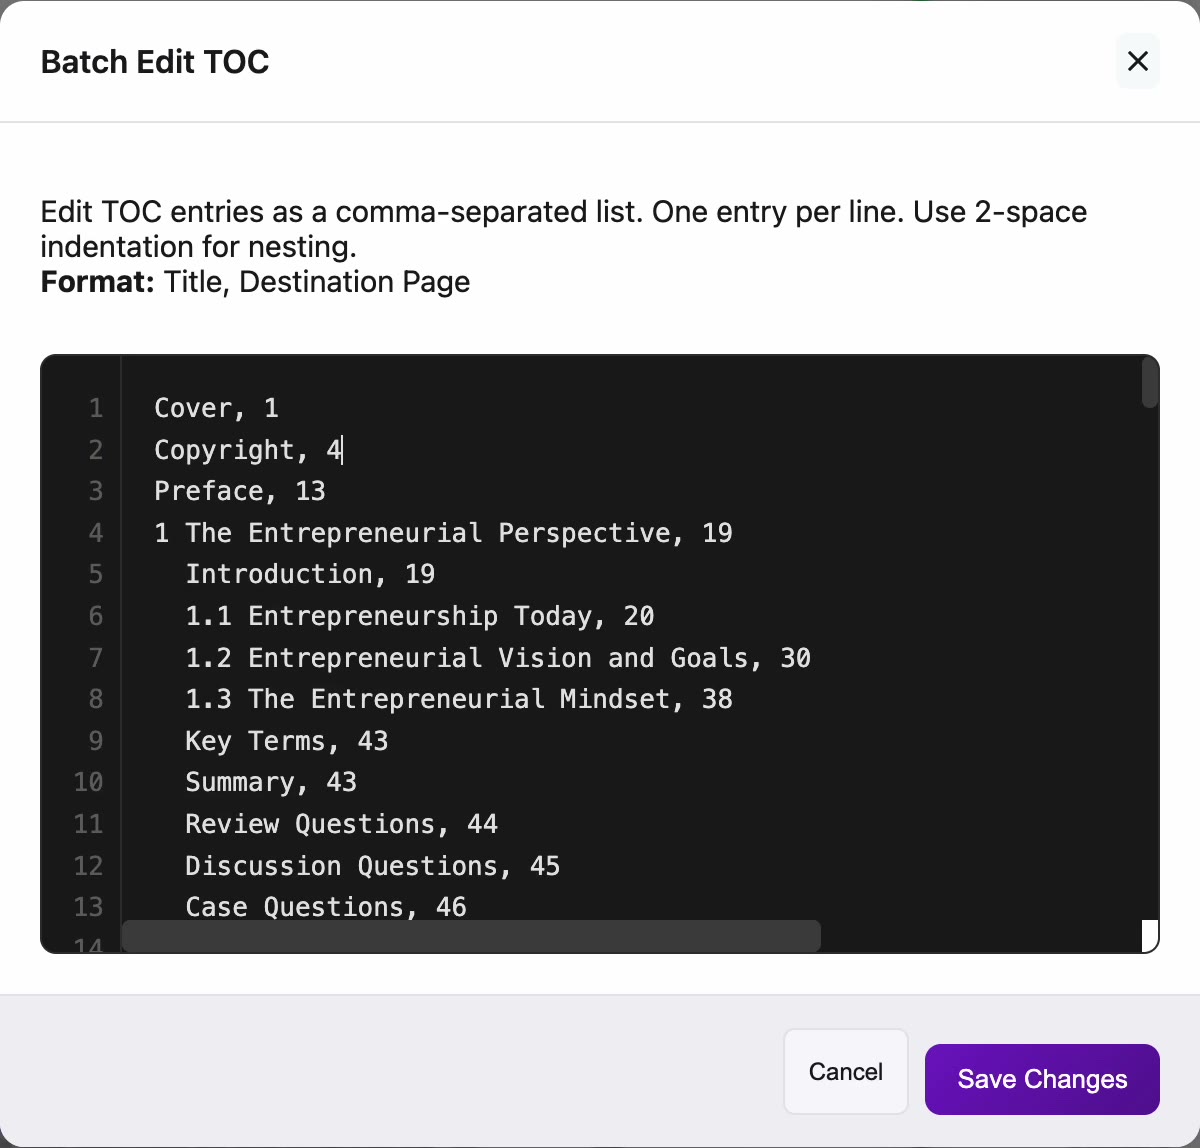
- Click Save Changes.
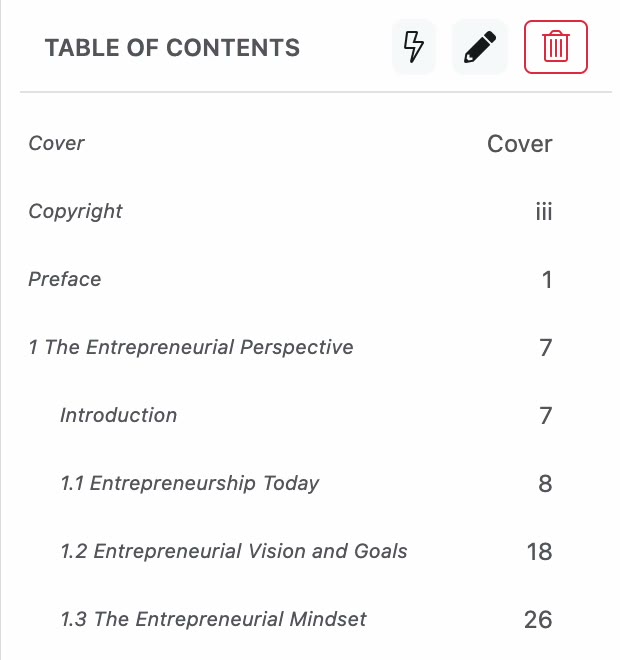
The destination page is the page's position in the PDF, not its printed page number. In the example, the copyright page is page 4 of the PDF, and the panel shows it with its printed number, iii.
Set chapter breaks
Each chapter in the Chapters panel becomes a separate HTML file in the ePUB. Open the panel from the third tab in the left sidebar.
- Check the list. Each chapter shows its title, its page range and, in the dropdown, which exports include it: All, PDF or ePUB.
- Use the All, PDF and ePUB filters at the top to see the chapters for one output. A warning tells you how many pages aren't in any chapter, or are left out of that export.
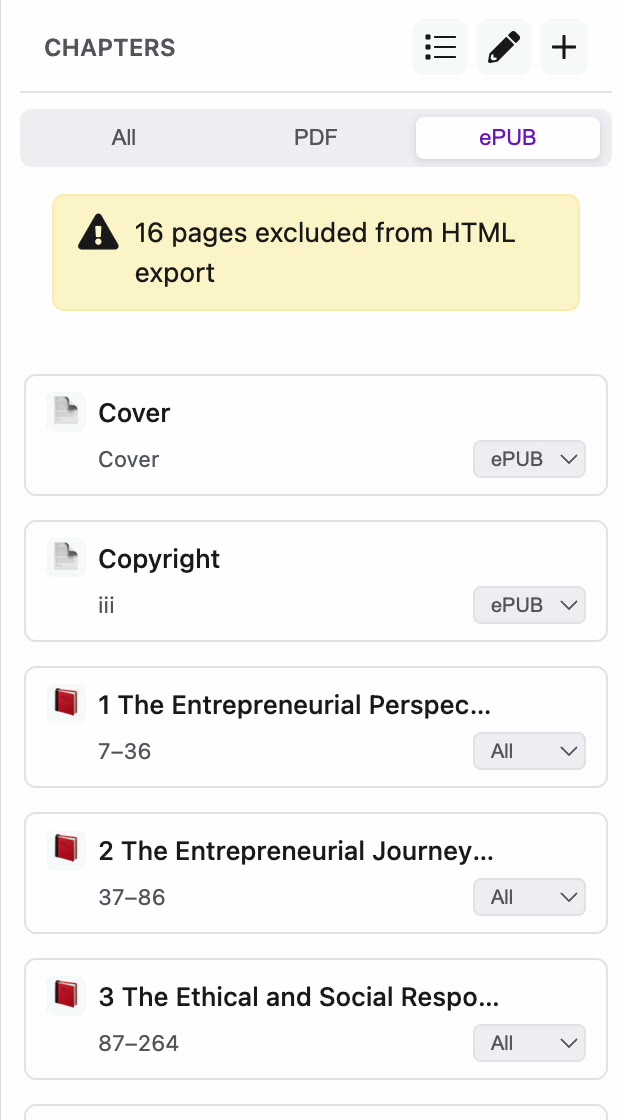
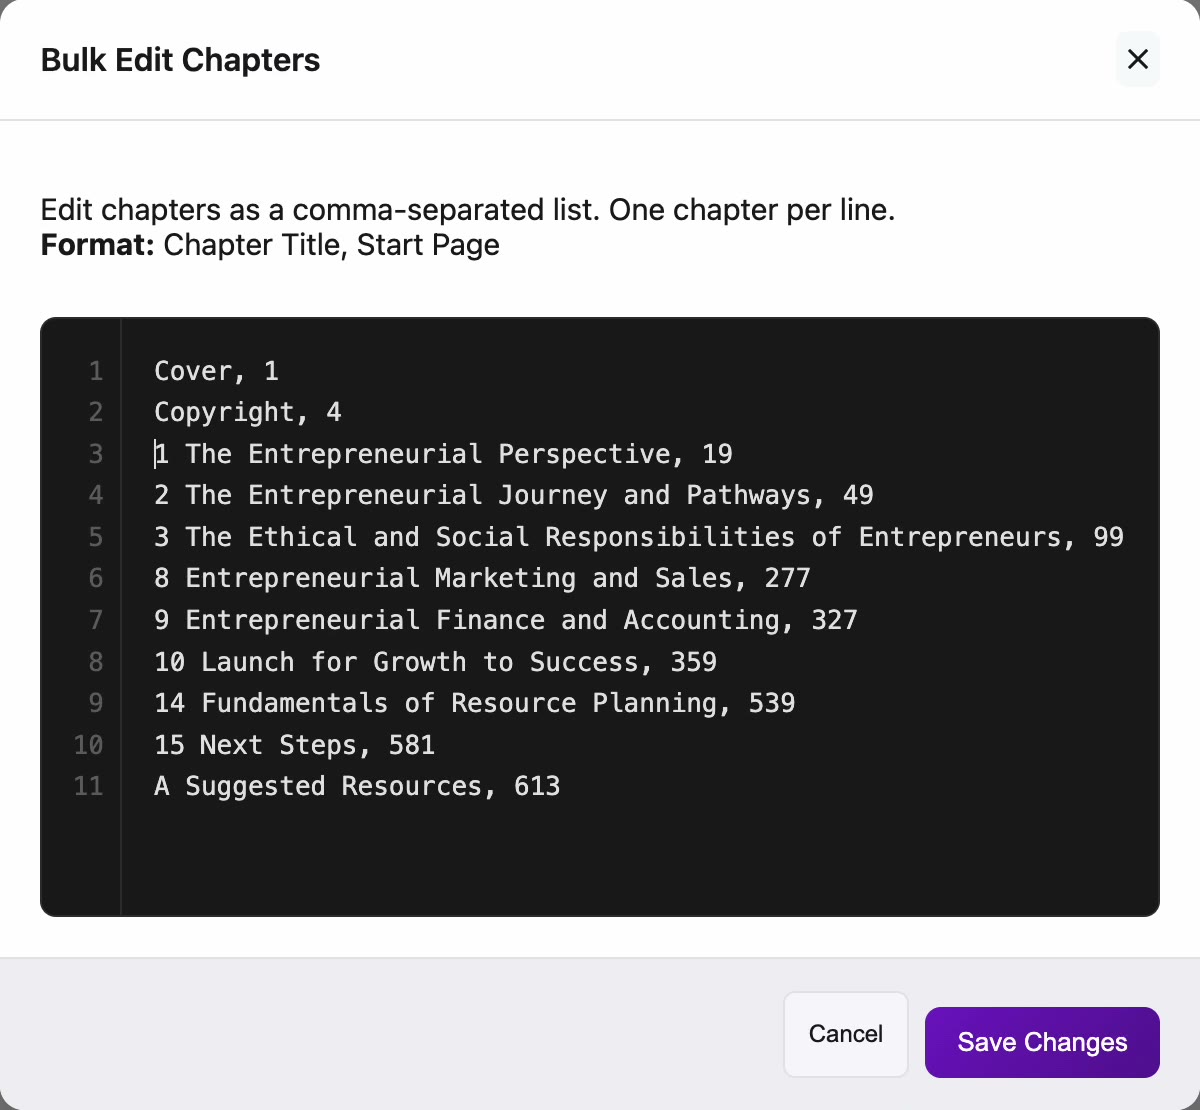
- To edit the whole list as text, click the pencil (Bulk Edit (CSV)). Each line is
Chapter Title, Start Page, where the start page is the page's position in the PDF. Click Save Changes when you're done.
Add a chapter break on the PDF
You can also start a chapter straight from the page view, which is quicker for short front-matter sections such as the title page, an advertisement page or the contents.
- In the page view, scroll to the gap between the last page of one section and the first page of the next.
- Hover over the gap and click Add chapter break.
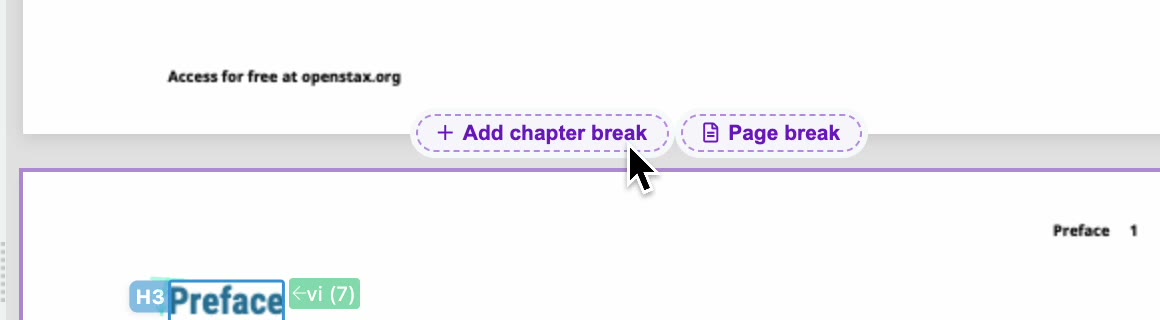
- Type the chapter title in the field and press Enter. Press Esc to cancel.
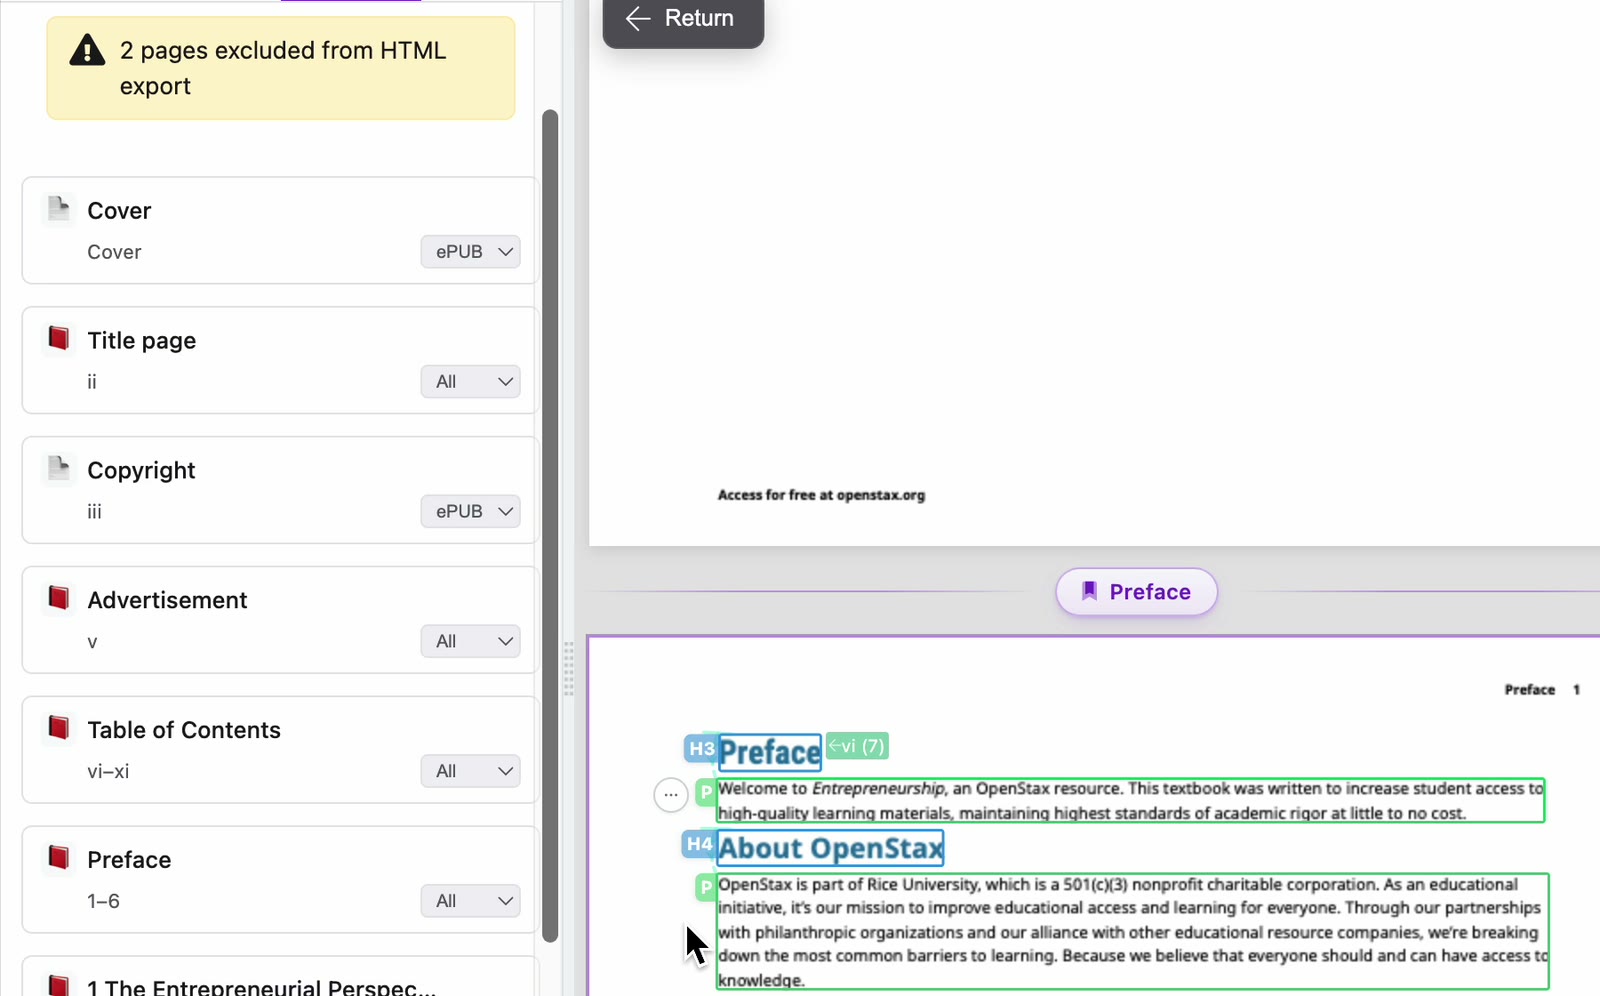
The new chapter appears in the Chapters panel, and its title is shown in the gap above its first page. Repeat for every section that should be its own file. In the example, the title page, the advertisement page, the table of contents and the preface each become a chapter.
Check it worked
- The Table of Contents panel lists every entry you want in the ePUB navigation, in reading order, with the right pages.
- In the Chapters panel, the warning shows fewer excluded pages after each chapter break you add. In the example it drops from 16 pages to 2.
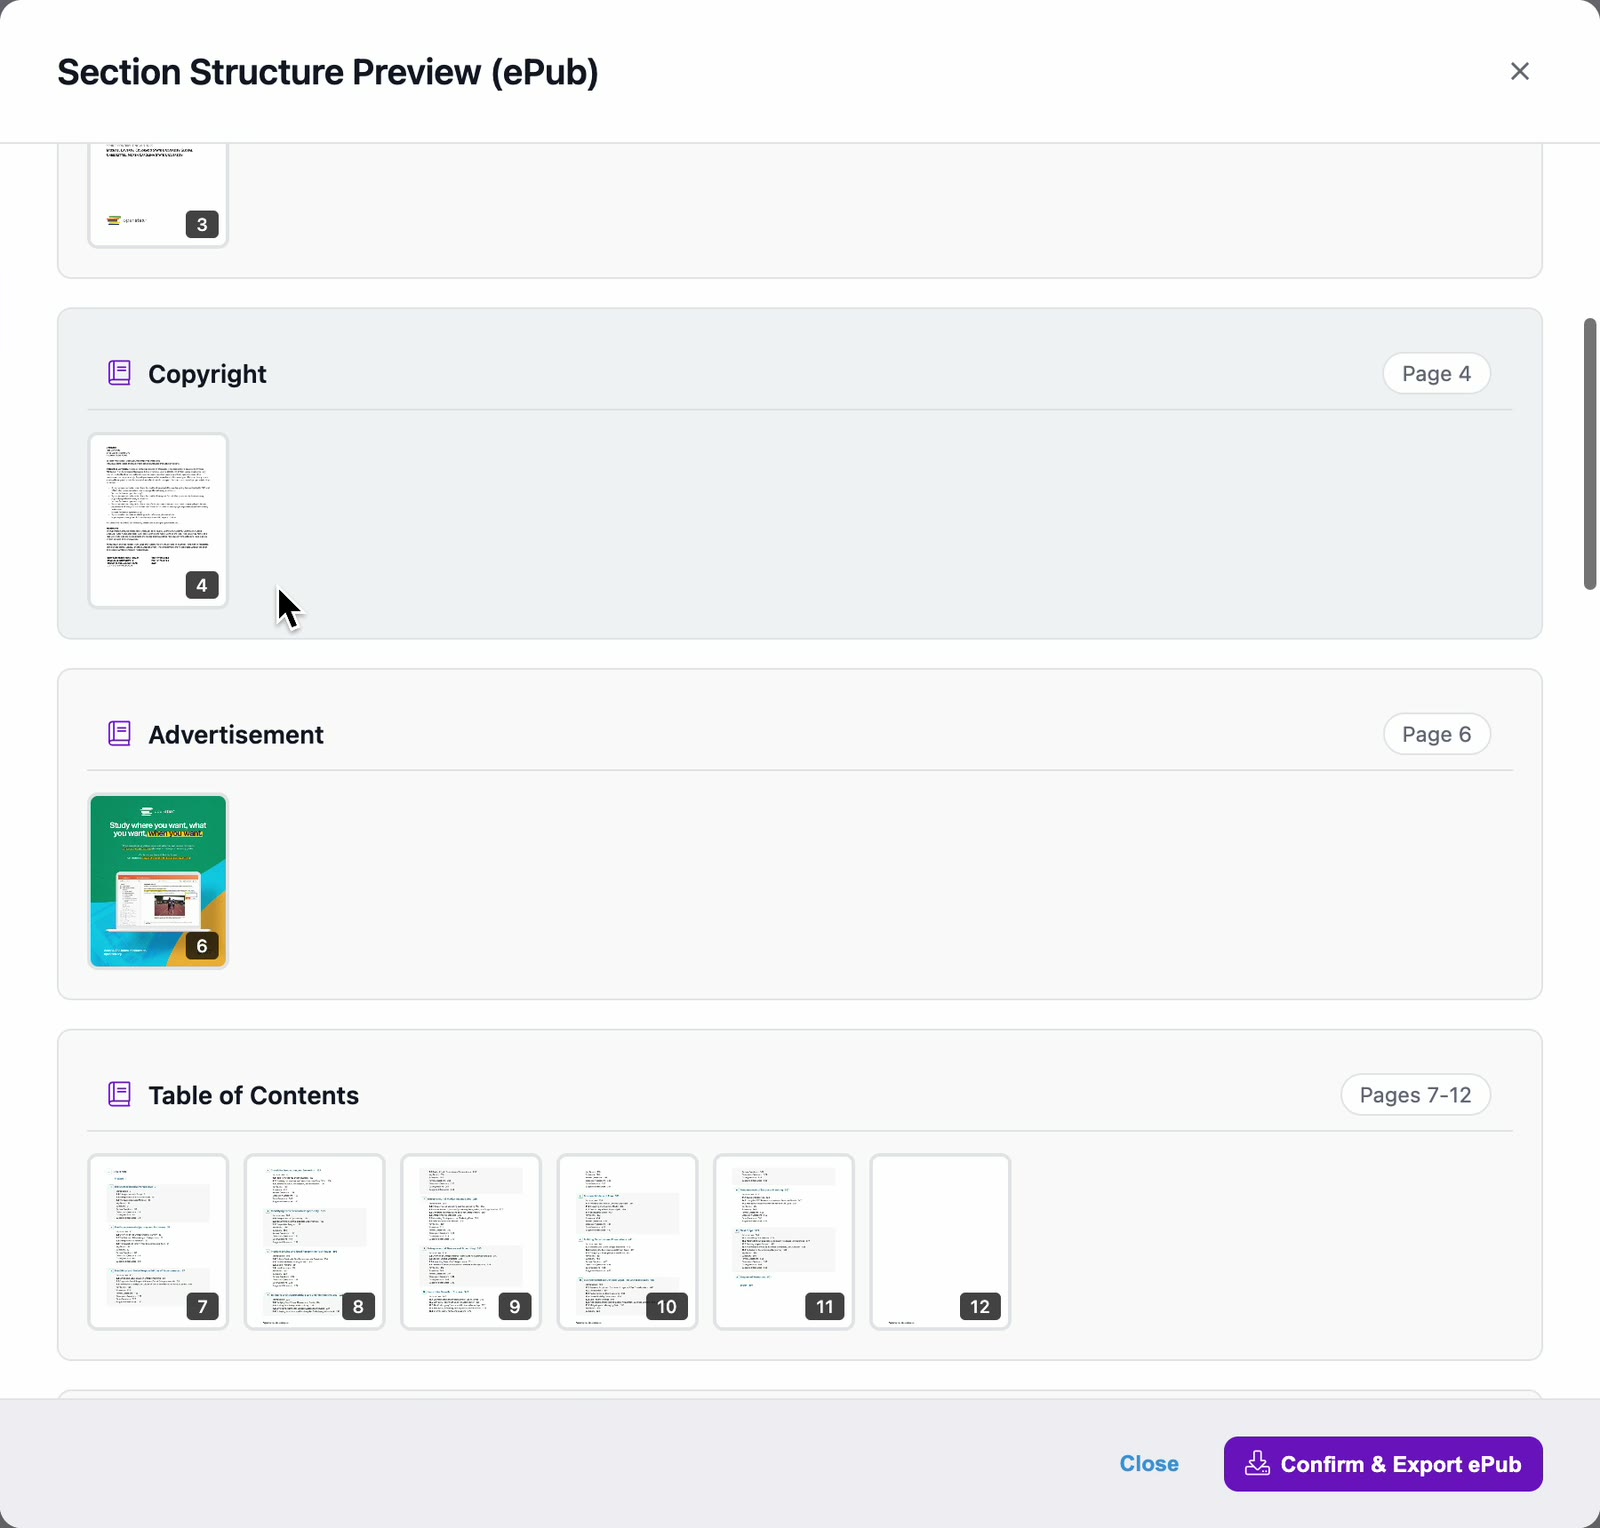
- When you export the ePUB, the Section Structure Preview (ePub) shows how the pages are split into chapters, following the Chapters list. Check it before you click Confirm & Export ePub. See Export the accessible ePUB.
If something goes wrong
- There's no Import TOC button. It appears only when the page you're on has TOC entry (TOCI) zones. If the contents page isn't tagged as TOC entries, open Actions and choose Process TOC, or press Shift + C, then import again. See Check and fix zones page by page.
Related articles
Watch the video
TOC & chapters, part 8 of the PDFxt video series.