
Edit styles and HTML for a zone
Inspect and edit the CSS applied to any zone with a live preview, fix parent and reading order so a box renders as one unit, and edit a zone's HTML directly.
Each zone in the ePUB takes its look from a style in the document's stylesheet or your company stylesheet. From the HTML preview you can see which style a zone uses, change its CSS with a live preview, and decide whether a change applies to that zone only or to every zone that uses the style. When a box or heading still renders wrongly, the cause is often its structure, so this article also covers fixing parent and reading order, and editing a zone's HTML.
Before you start
Clean up the extracted styles and map your company styles first, so that most zones already use the right style. See Clean up styles and map company styles.
Open the styles pane and inspect a zone's style
- In the HTML Preview header, click the palette button (Show the styles pane). The Styles pane opens on the right, listing the styles you can apply.
- Make sure style names are shown beside the zones. If they aren't, click the tag button next to it (Show each zone's style name beside it). Each zone then shows its HTML tag and style name in the margin, for example
h4 h4-xl-2.
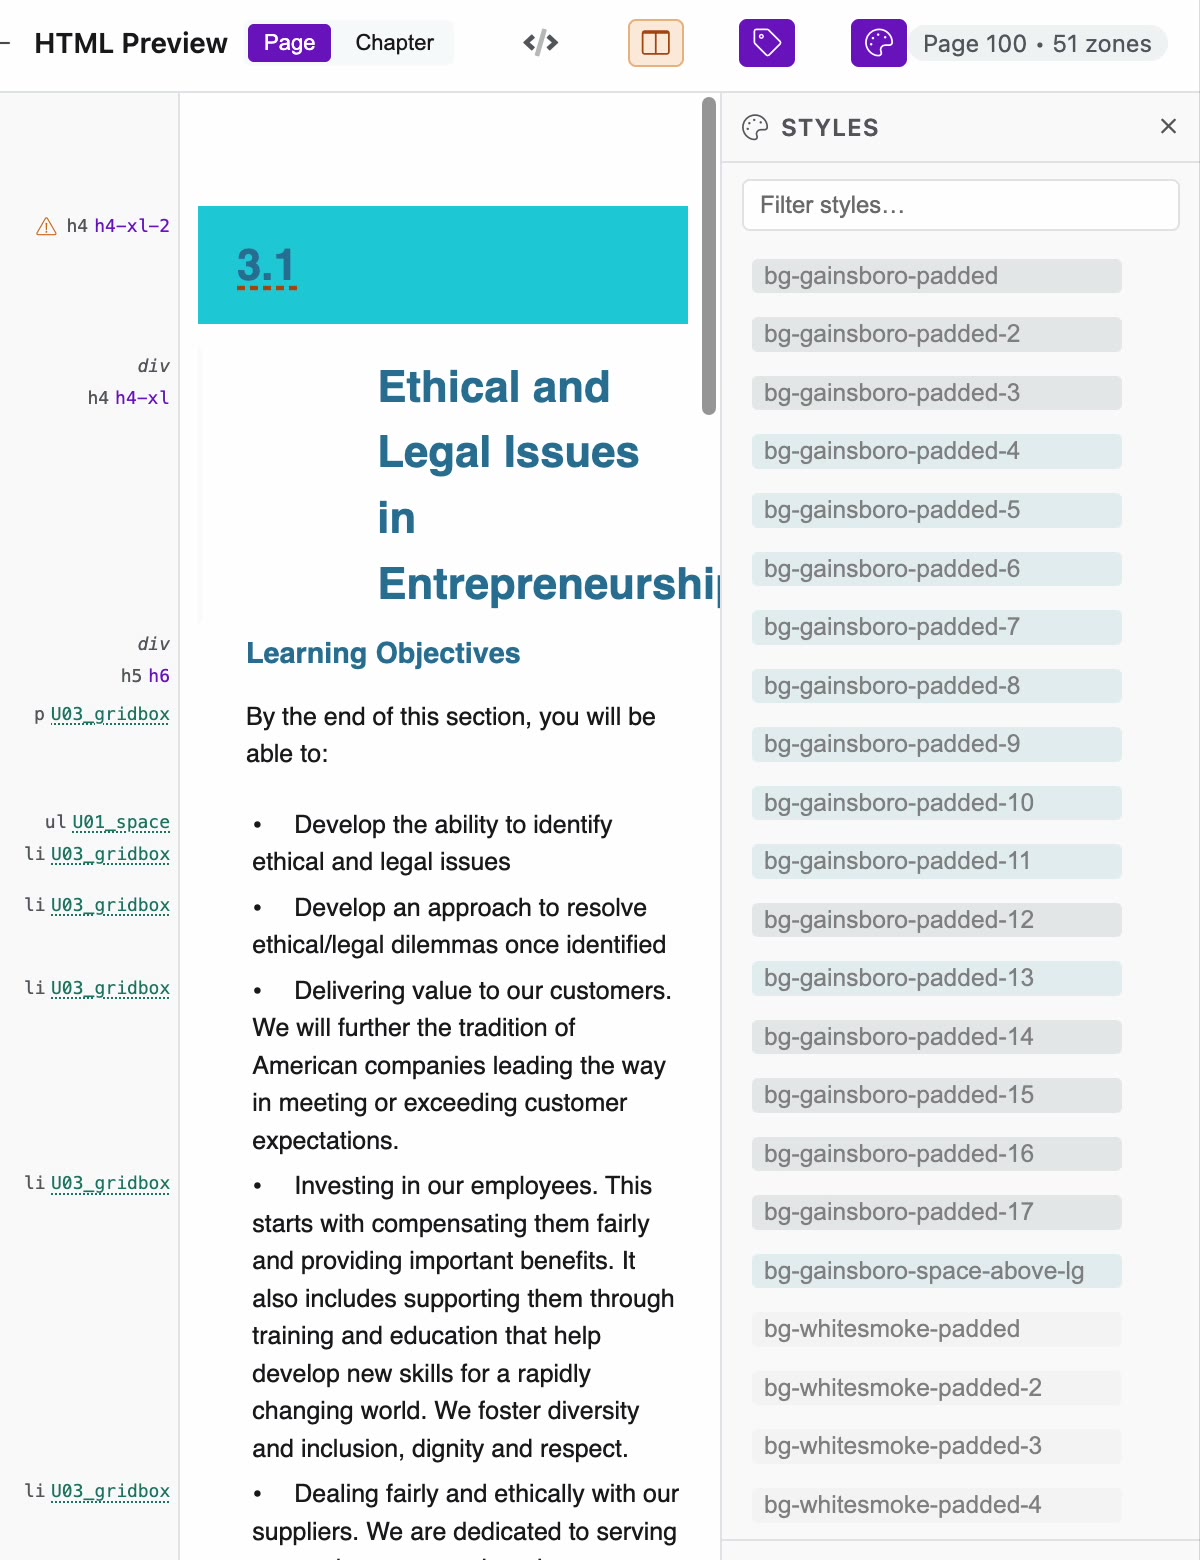
- Click a zone's style name in the margin. The Styles editor opens with the CSS applied to that zone.
The top of the editor shows the Style name, whether it is a document or company style, and how many zones use it. Below are the formatting buttons and the Properties list, one row per CSS property. Drag the editor by its header if it covers what you want to see.
You can also open the editor from the zone's toolbar on the PDF side, with Edit style.
Edit a style's CSS
- Change a property in the Properties list. For a colour, click the swatch to open the colour picker, or type the value. To add a property that isn't listed, use Add property… and type to search, for example margin, colour or border.
- Edited rows are marked with a dot. If a text colour no longer has enough contrast, the editor shows the ratio and a Fix to button with the closest colour that passes.
- Click Preview to see the change on the page before you save. Nothing is saved while you preview, and Cancel puts the page back.
- Under Apply to, choose where the change goes:
- This zone only: the edit applies to the zone you opened.
- Set for all N zones using "style": the style itself changes, and every zone that uses it follows.
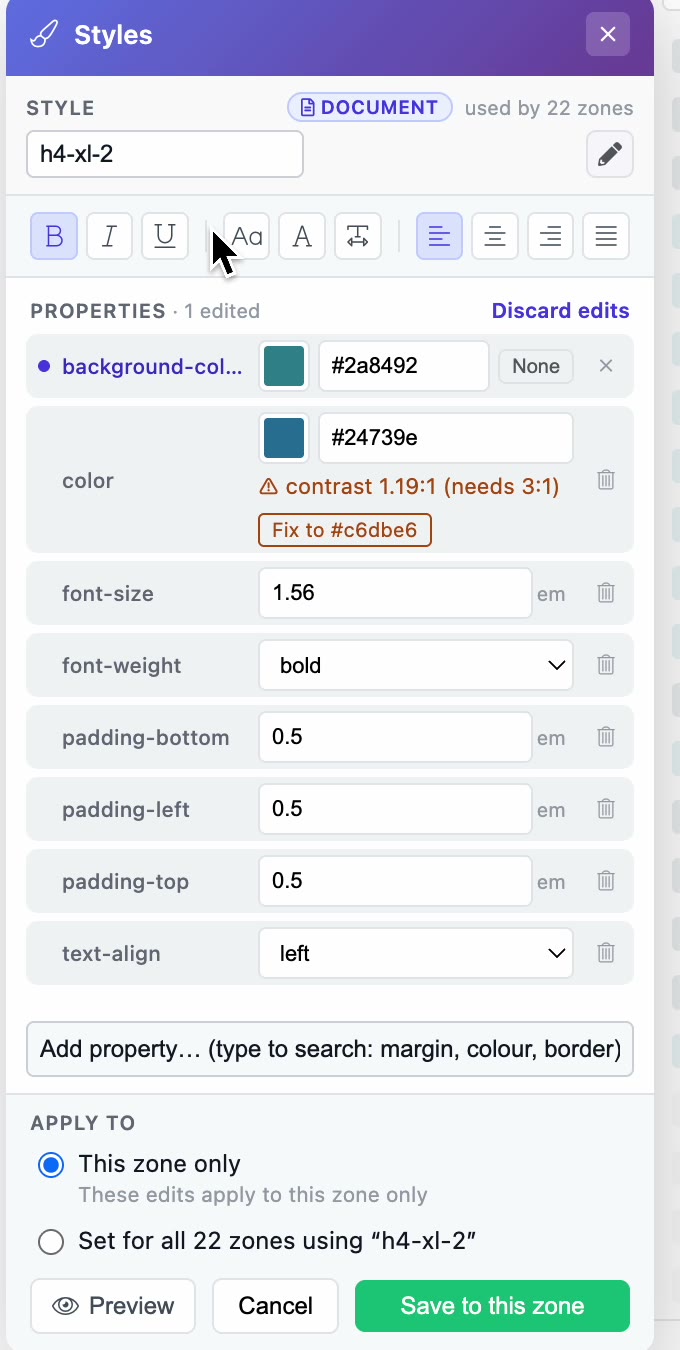
- Click the button at the bottom right. Its label says what it does, for example Save to this zone or Set for all 24 zones using "h4-xl". When only this zone uses the style, the button reads Save into the style "…" instead.
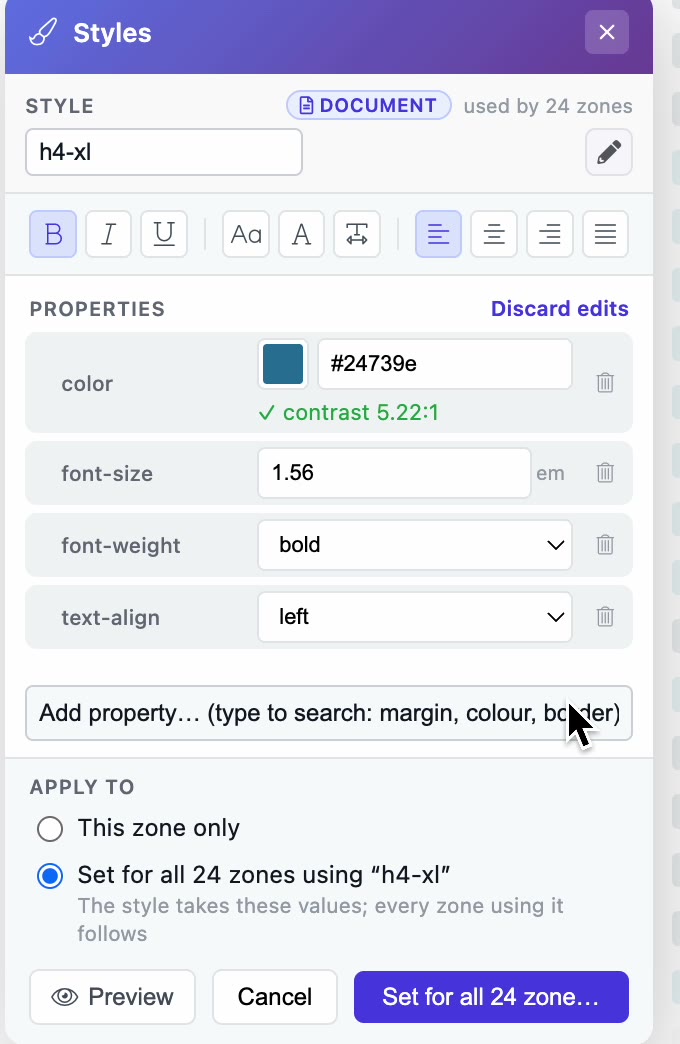
To start over, click Discard edits above the properties list.
Remove or replace a zone's style
- Open the zone's style in the Styles editor.
- Open the Style dropdown. To remove the class, choose None. To replace it, choose another style. The list groups styles under Closest to this zone, Document styles and Company stylesheet. In most cases, replace the style with one of your company styles rather than removing it.
- Under Apply to, choose This zone only, or apply the change to every zone that uses the old style, for example Remove "h4-xl-2" from all 22 zones.
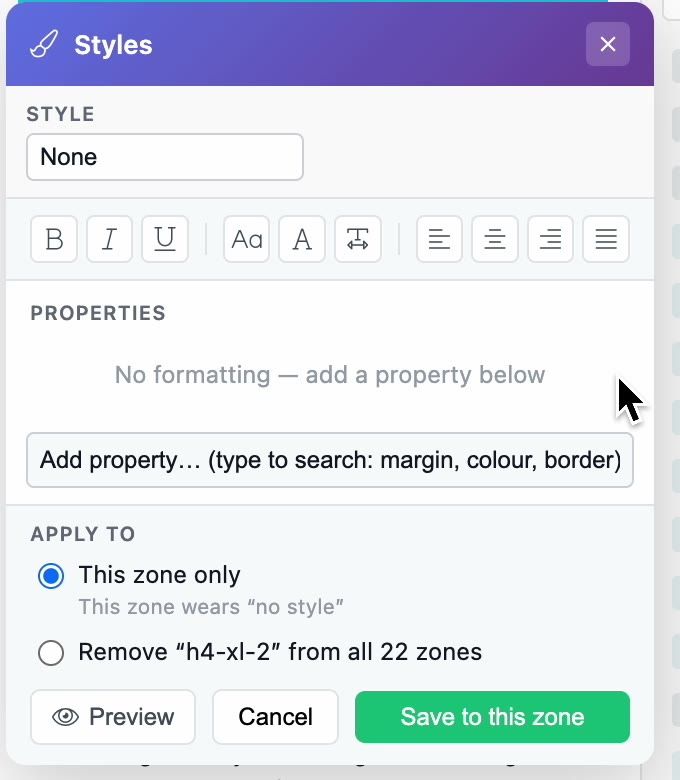
- Click the button at the bottom right to save.
Bring a heading into its box
Sometimes a box's heading is captured outside the box, so the ePUB shows the heading and the box as two separate blocks. Styling can't fix this. Fix the structure first, then style the box and heading.
- Open the Properties tab in the left panel, which lists the page's zones, and look at the box's zones. Here the box is a Section holding three paragraphs, while its heading WORK IT OUT sits in a different section above it.
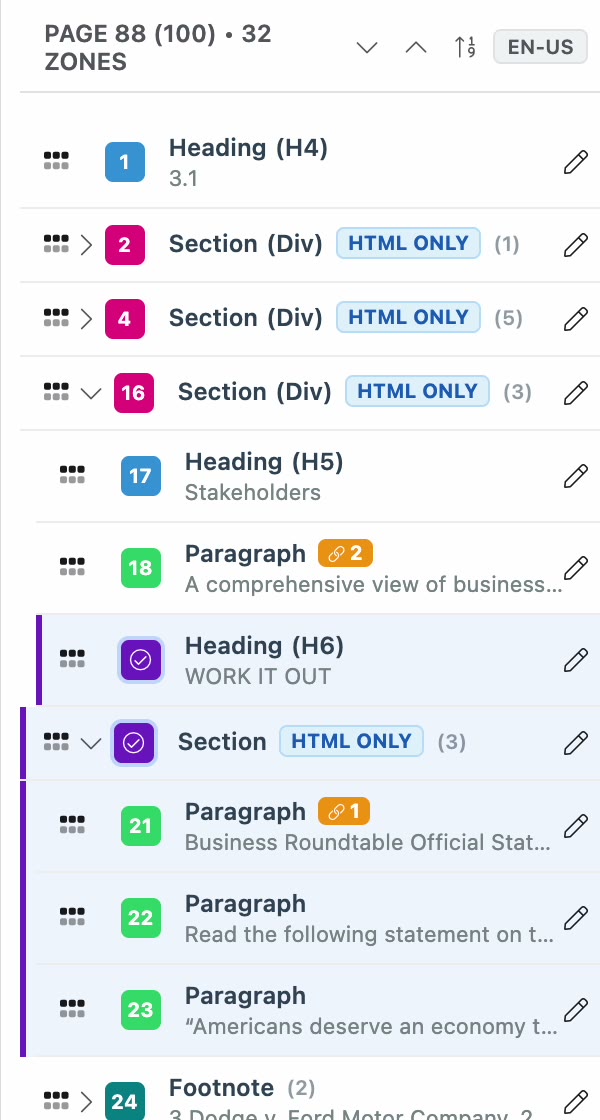
- If the heading is wrapped in an extra section that doesn't belong, select that section and click Unwrap in its toolbar (Shift + U). The section is removed and its children stay on the page.
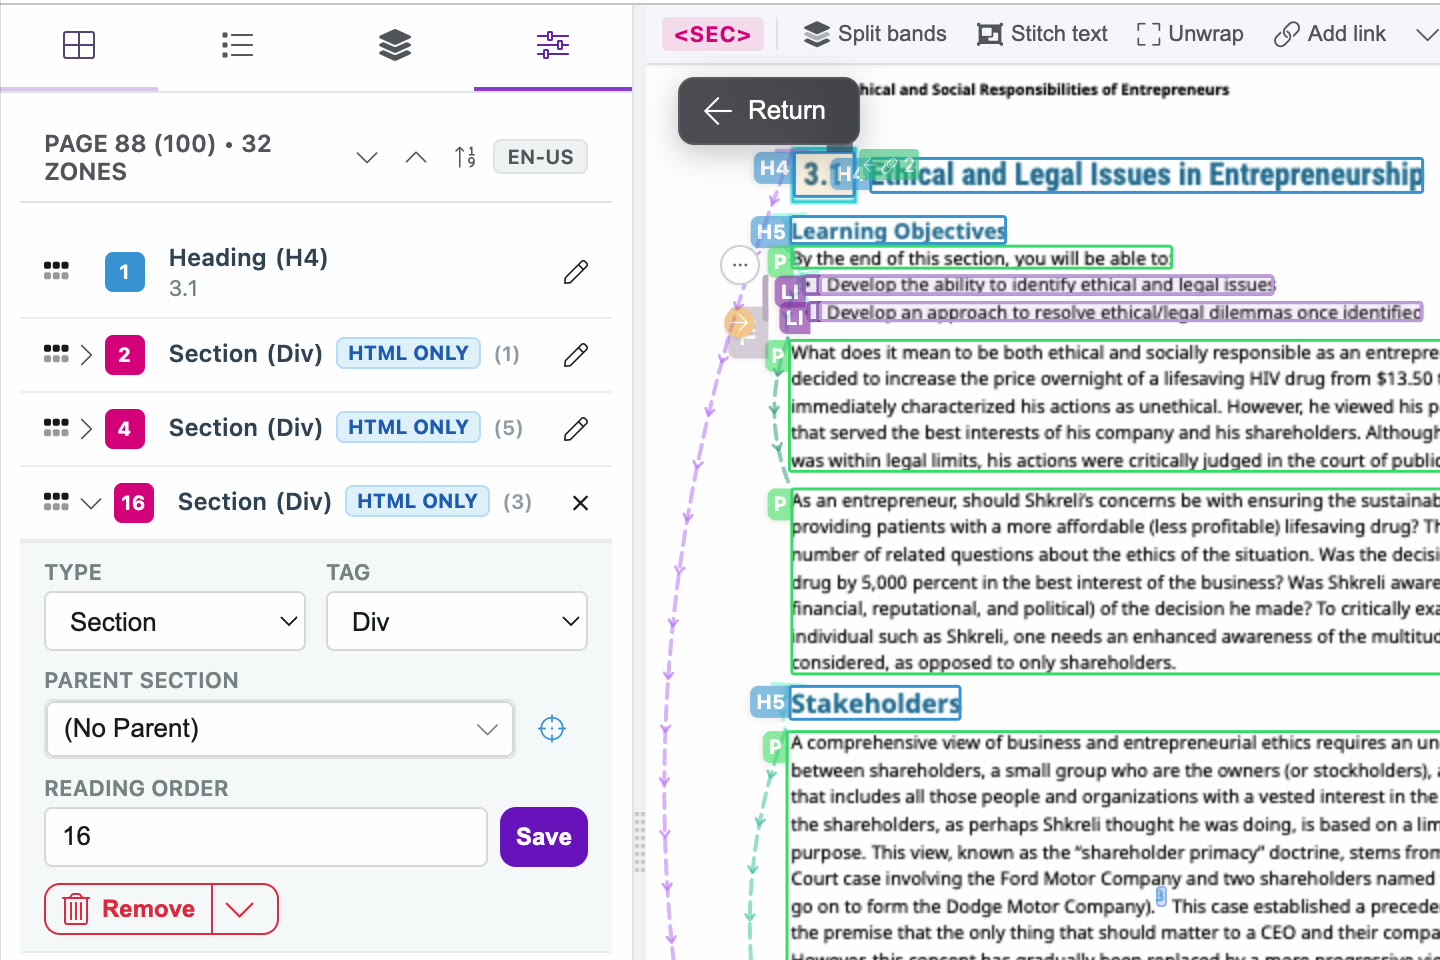
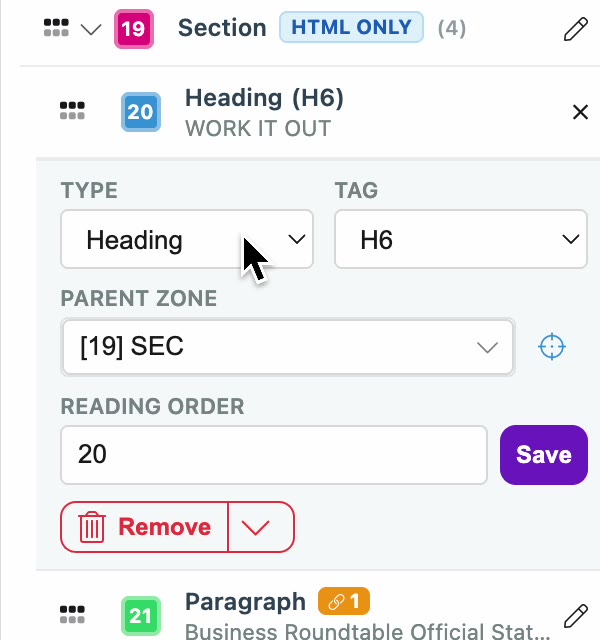
- Select the heading. In Parent Zone, choose the box's section, for example [19] SEC. The heading moves into the section, after its last child.
- In Reading Order, enter the number that puts the heading before the box's first paragraph, and click Save.
Style the box and its heading
With the heading inside the box, style each one separately so they render as one unit.
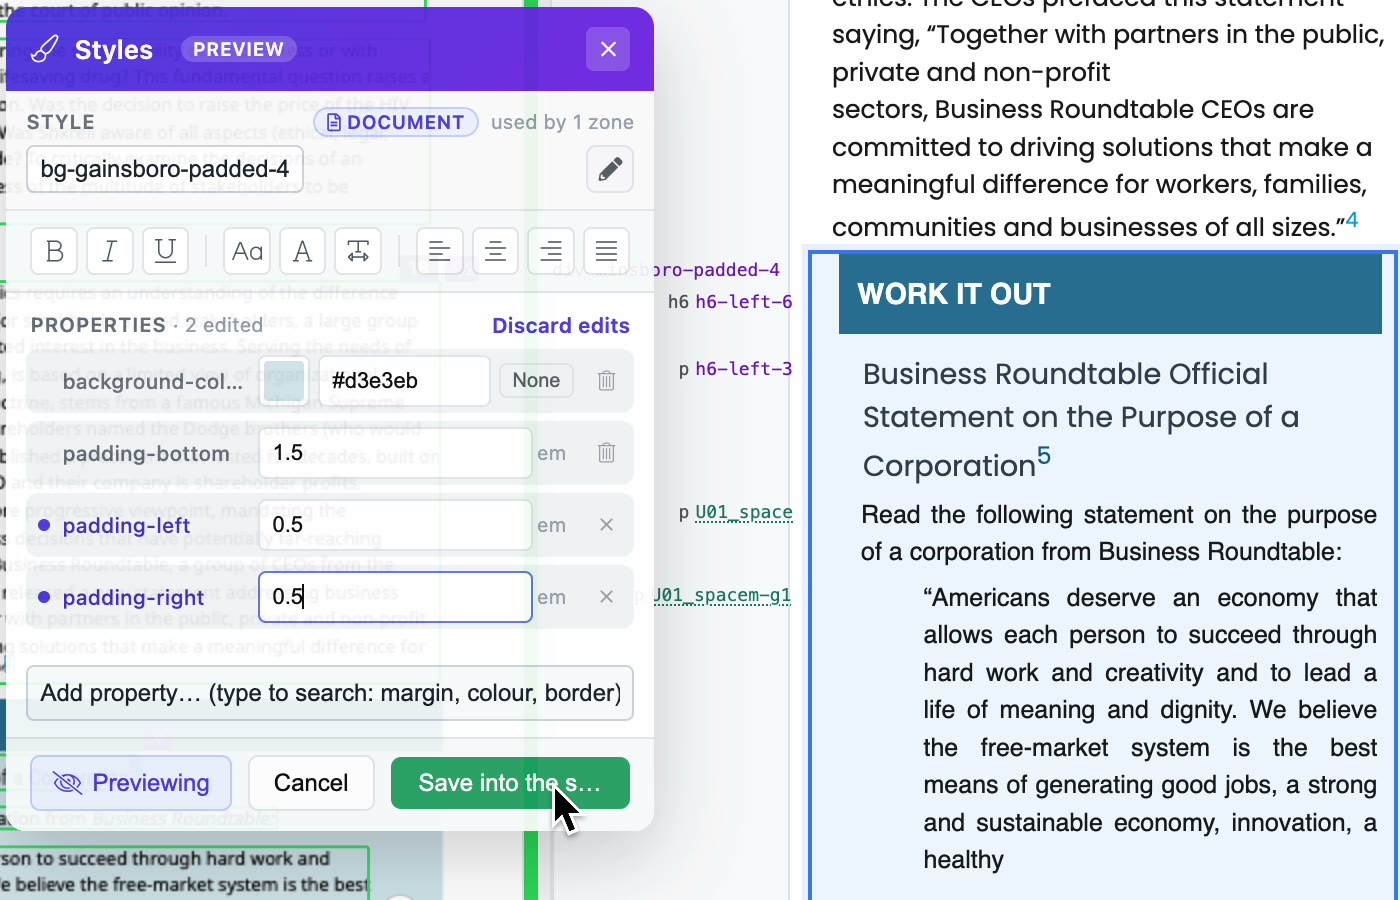
- Click the box's style name in the margin to open its style.
- Adjust the properties, such as its padding, and click Preview to check the result on the page. Edit the values until it looks right, then save it.
- Click the heading's style name and open its style.
- Adjust its margins, preview the result, and click Save to this zone.
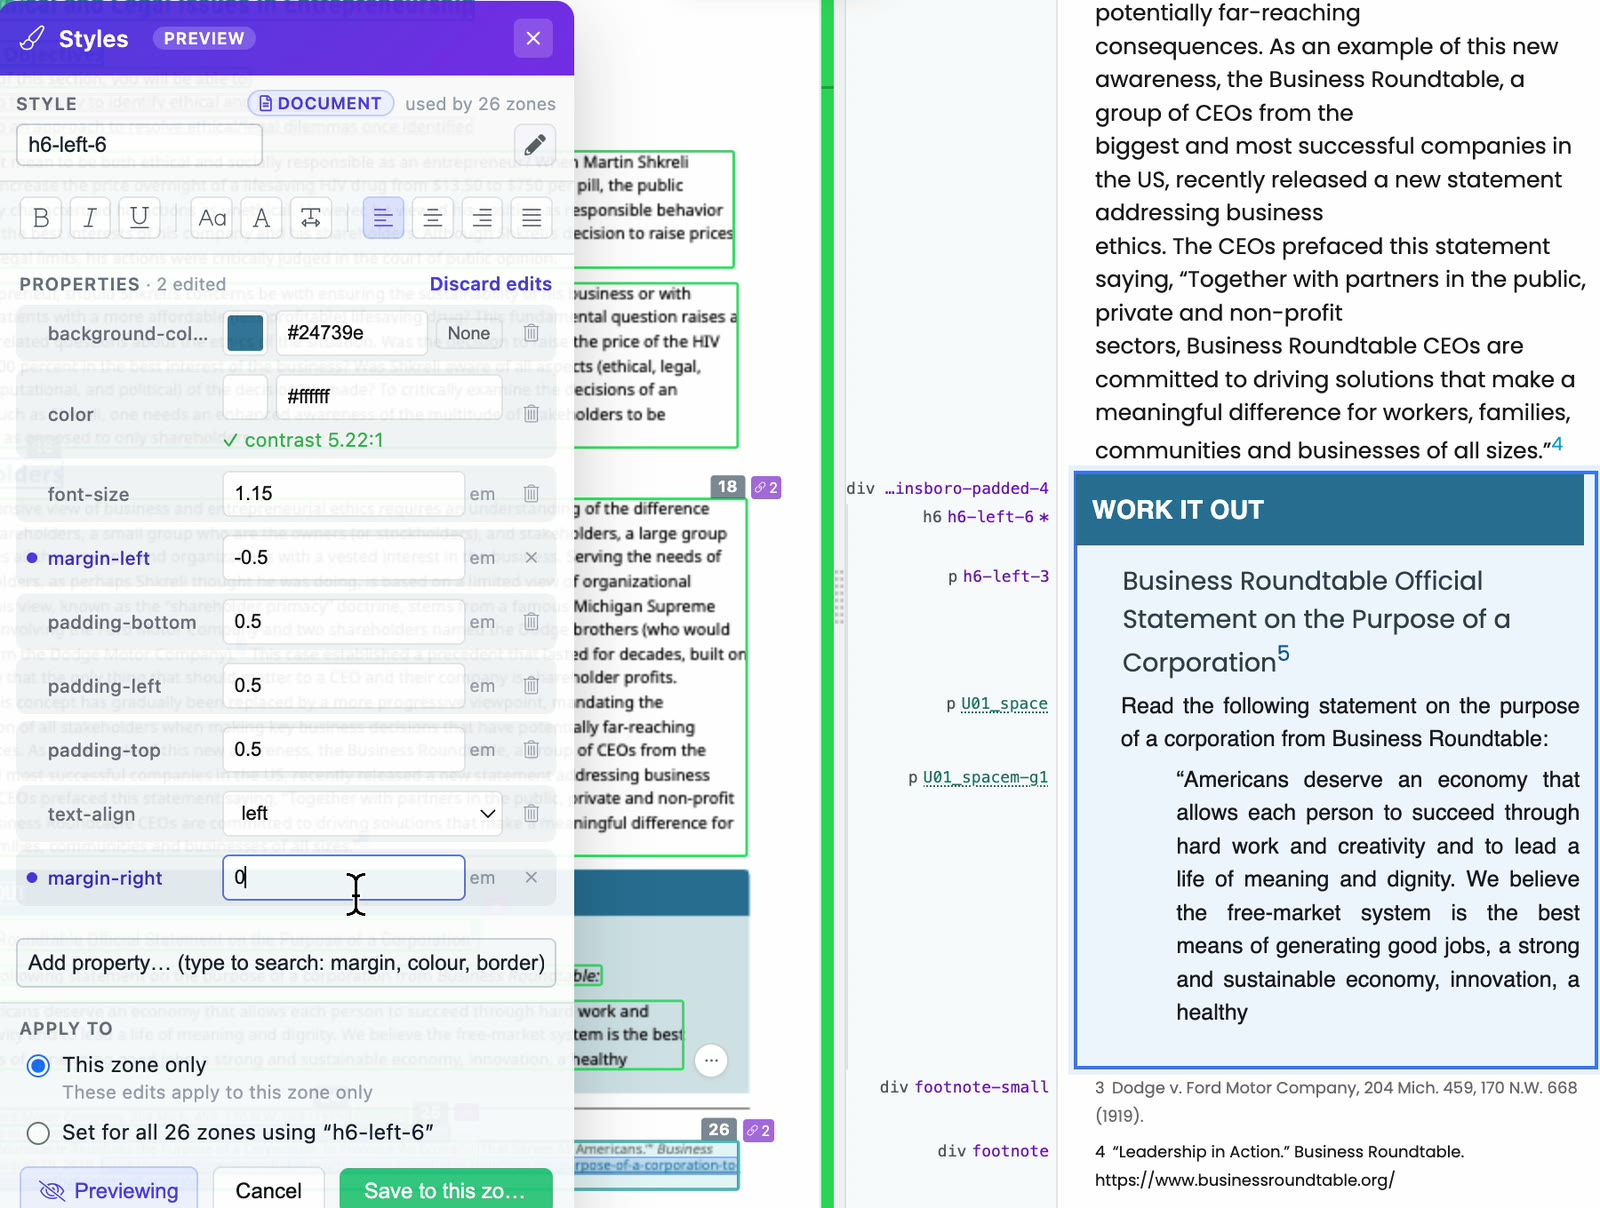
To match a colour from the page, click the swatch and use the eyedropper in the colour picker to sample it from the PDF.
Change a company style on one zone
The same editor opens on zones that use a company style. These are marked company.
- Click the zone's style name and edit the property, for example a paragraph's margin-left.
- Click Save to this zone. The change applies to this zone only. The option to set it for all zones is unavailable, because a company style is edited in the company stylesheet, not here.
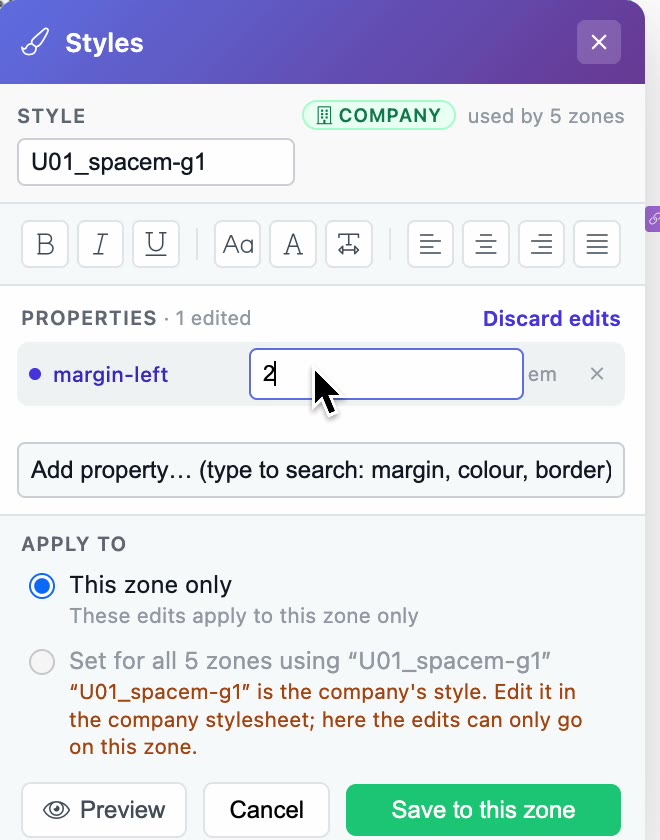
In the margin, an asterisk after a style name means the zone has its own formatting on top of its style. In the Styles pane, double-click a style to apply it without that formatting.
Apply a different style from the styles pane
- Select the zone.
- Type in Filter styles… at the top of the Styles pane. The list includes the document's styles and, under Company stylesheet, your company styles.
- Click a style to apply it. The preview updates and the zone's style name changes in the margin. The current style has a tick.
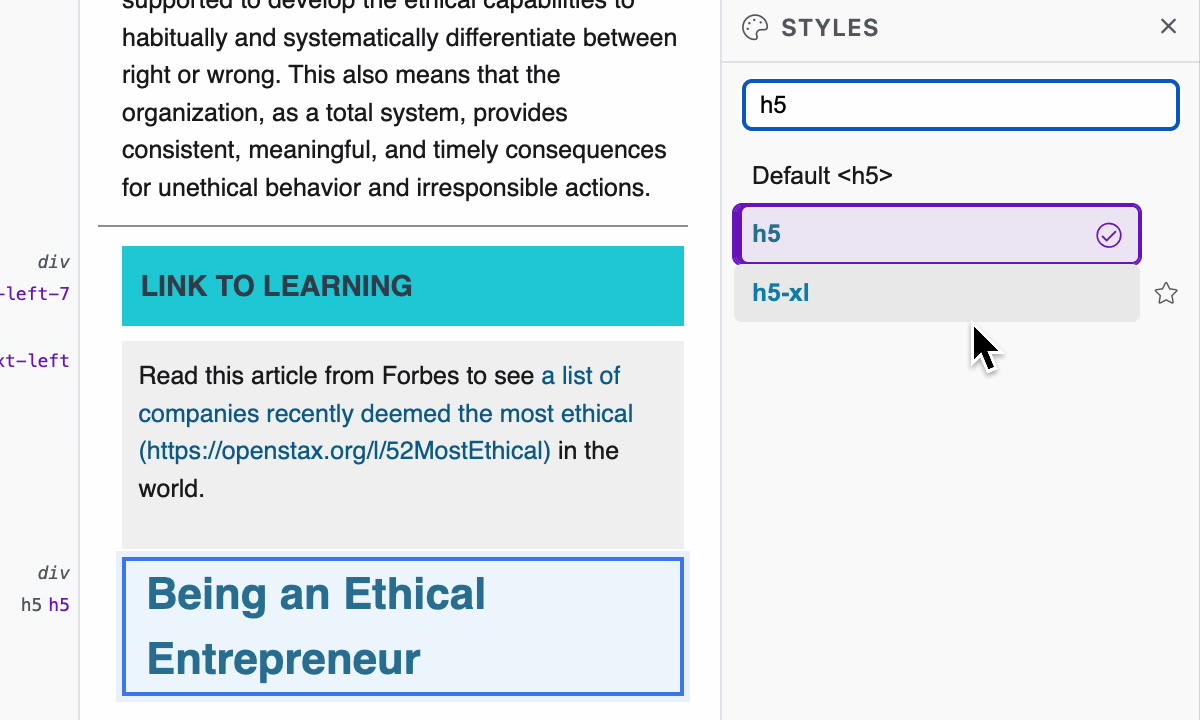
Edit a zone's HTML
If a zone's content carries markup you don't want, such as leftover inline formatting in a footnote, edit its HTML directly.
- Hover over the zone's style name in the margin and click the code button (Edit HTML). You can also use Edit HTML in the zone's toolbar.
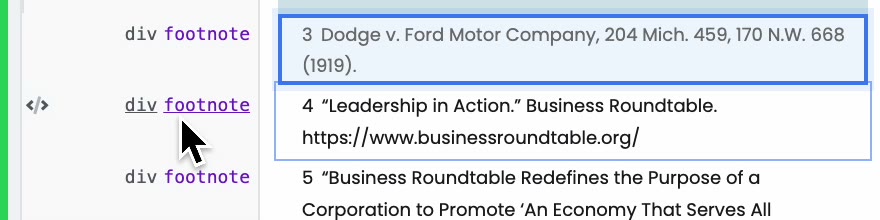
- The Edit HTML window opens with the zone's content. Make your change, for example removing
<span>tags that carry the PDF's colour and font. Auto Format indents the code to make it easier to read.

- Click Save Changes.
Check it worked
- After you save a style change, a message confirms it, for example "bg-gainsboro-padded-5" updated on 1 zone, and the HTML preview shows the new look.
- A box and its heading render together, with the heading at the top of the box.

Related articles
- Clean up styles and map company styles
- Check and fix zones page by page
- Fix footnotes and note links
- Preview and inspect the ePUB
Watch the video
Applying styles, part 9 of the PDFxt video series.